Pura QCRO4V-50 Spezifikationen
Stöbern Sie online oder laden Sie Spezifikationen nach Sanitärkeramik Pura QCRO4V-50 herunter. Pura QCRO4V-50 Specifications Benutzerhandbuch
- Seite / 32
- Inhaltsverzeichnis
- FEHLERBEHEBUNG
- LESEZEICHEN
- Models: QCRO4V-50 1
- QCRO4V-50-PL 1
- QCRO4V-75 1
- QCRO4V-75-PL 1
- Safe Practices 2
- Serial Number 2
- Table of Contents Page 3
- Dimensions 5
- Table 1 5
- Performance Data Sheet 7
- Figure 1 8
- Figure 2 9
- Figure 3 10
- Preparation 11
- Product Information 11
- Installation 13
- Step 2 – Faucet Installation 15
- Figure 10 16
- Standard Faucet Installation 17
- Tubing Connections 18
- Cleaning the Faucet 18
- Air Gap Faucet Installation 18
- Step 4 – Connect System Drain 19
- Figure 14 20
- Install Filter Cartridges 21
- Connect System 21
- Figure 15 21
- Step 7 – Start-Up 22
- Performance Measurements 23
- Figure 18 24
- Pressure, Pressure, Pressure 24
- Service and Maintenance 25
- Troubleshooting Guide 29
- PURA Guarantee 31
- 55025.0113 32
Inhaltsverzeichnis
Quick Change Reverse Osmosis Drinking Water SystemInstallation, Operation & Service Instructions with Part ListModels: QCRO4V-50 QCRO4V-50-PL QC
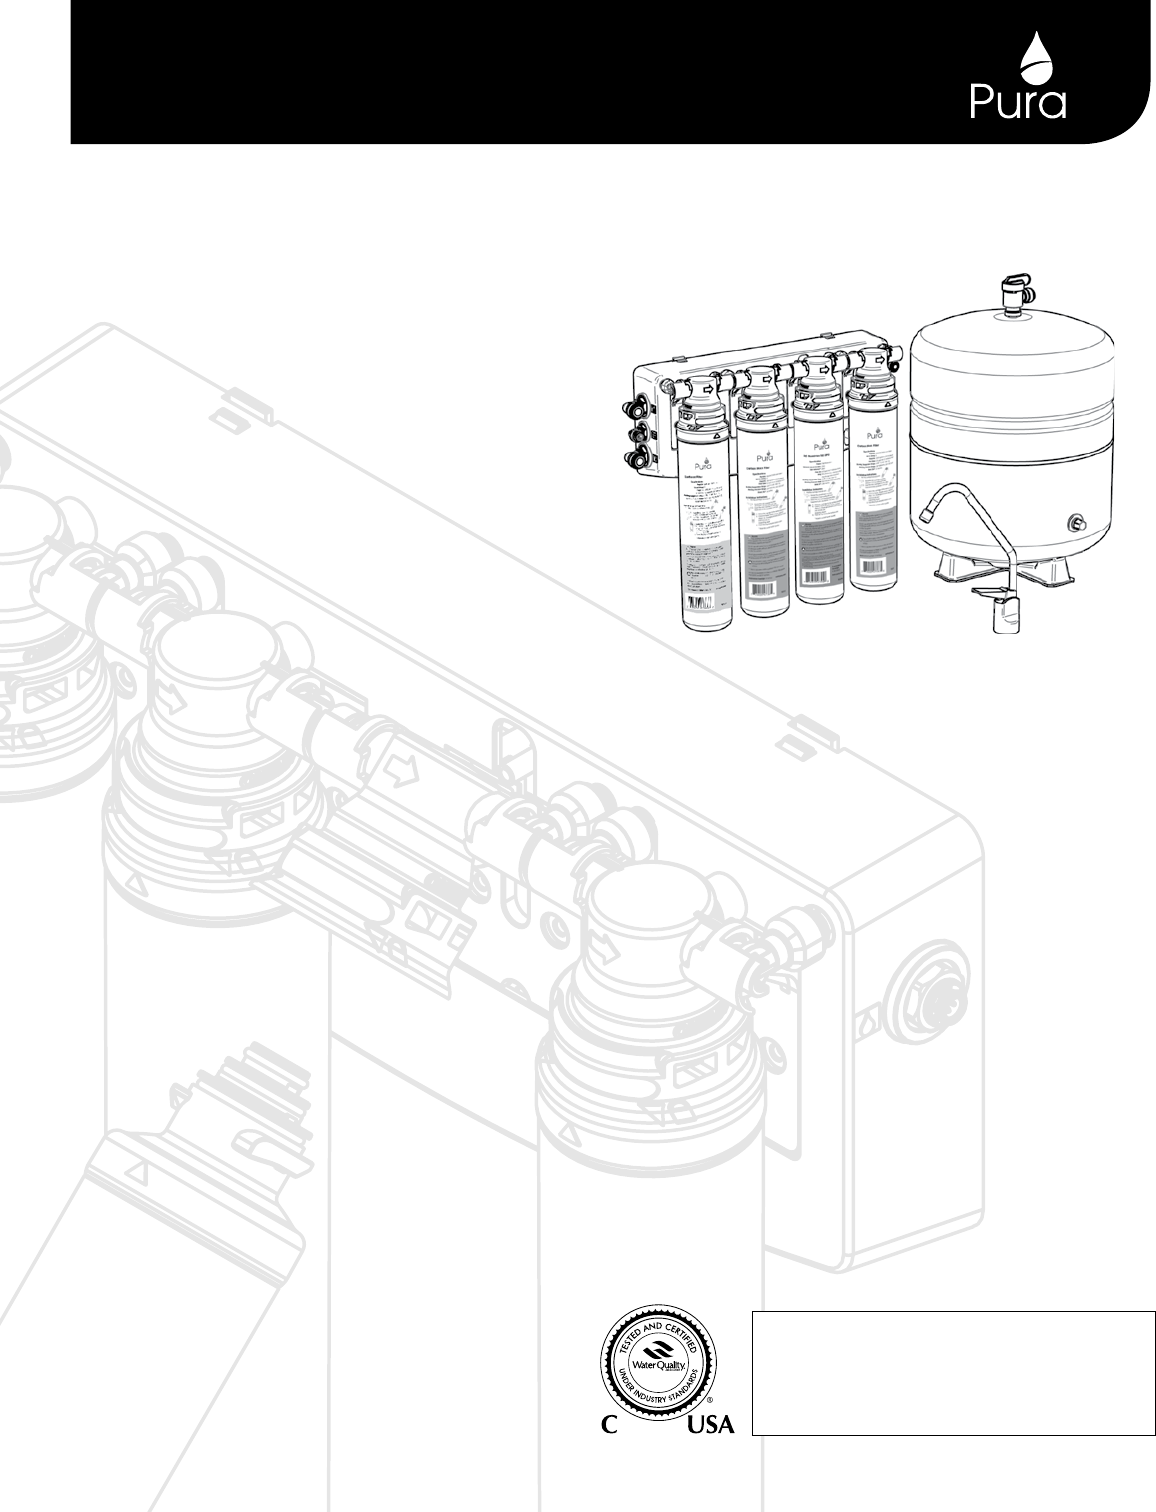
8OR3X2X 1. RO Manifold with Flow Control 2. Sediment Filter 3. Carbon Block Filter 4. RO Membrane 5. Carbon Block Filter 6. Metal or Plast
9Tubing ConnectorsThe PURA system features reliable and convenient push-to-connect tubing connectors. Tubing is easily connected and disconnected fro
10Verify Flow Control LocationThe RO manifold comes attached with the elbow fitting flow control. This flow control is attached to the manifold by qui
113/8” White TubingStorage Tank PreparationNOTE: Changing the air pressure will alter the amount of water stored in the tank. Increasing the pressure
12The following steps will enable you to install the system quickly and orderly. Some variation may be necessary depending on the installation. See pa
13Step 2 – Faucet InstallationTo simplify its access and installation, we suggest you install the faucet on the rear lip of the sink. It should be eve
141/4” Red Tubing3/8” Red TubingFaucetBase(Remove white protective film.)Split WasherDrain Line from RO Manifold(1/4” Red Tubing)Drinking Water Line t
15FaucetBase(Remove white protective film)Plastic WasherLarge Rubber WasherSmall Rubber WasherNutFaucet AdapterLock Washer13567824Standard Fau
16Remove white protective film from faucet base. Verify faucet body, metal base, and rubber base washer are in place above sink (Items 1, 3, and 2).Lo
171/4” Red TubingStep 3 – Install Adapter Valve on Water SupplyStep 4 – Connect System DrainPlumbing codes require that the drain from reverse osmosi
Safe PracticesThroughout this manual there are paragraphs set off by special headings.NOTE: Note is used to emphasize installation, operation or main
182341Many homes are equipped with disposals and dishwashers. Special care must be taken when these appliances are present to prevent improper air
19Step 6 – Install Filter System AssemblyThe mounting bracket contains four mounting slots. The holes are sized to accept #10 round head wood screws
2044. Connect the 1/4” OD red tubing from the air gap inlet of the faucet to the concentrate outlet on the RO manifold.RedStep 7 – Start-Up 1. Sani
21The performance of the PURA system can be characterized and judged by the quality and quantity of the water produced by the system. By measuring the
22Pressure TankPura FaucetCold Water SupplyRO ManifoldDrain ConnectionBooster PumpFigure 181/4” Feed Line (White)3/8” ProductWater Line (Blue)3/8” Tan
23NOTE: The reverse osmosis membrane (Stage 3) Part # 41407003 is recommended to be changed once every three years or as needed.Service ScheduleTo k
241. Turn off incoming water supply to RO.2. Open RO Faucet and allow water to drain from the tank until it is completely empty.3. Check that air
25Parts Breakdown# Item # Description Qty.1 134040R Manifold, Quick Change RO, 4 Stage 12 92223 Valve, Auto Shut-off 13 41407553 Fitting,Check Valve,Q
2612131415111016171920181256789342X3XOther Parts 1. Storage Tank – Part # 92371 2. Faucet & Hardware – Part # 92192 3. Drai
27If a problem cannot be corrected through the use of this troubleshooting guide please have the following information ready prior to calling the 1-80
1Table of Contents PageSpecifications and Performance Data Sheet ... 2Suggested Install
28Problem Possible Cause Remedy4. External leakage. a. Tubing not fully seated in fitting a. Check all fittings for tightness.b. Tubing abraded in
29PURA GuaranteeSubject to the conditions and limitations described below, WaterGroup warrants its PURA Reverse Osmosis Drinking Water Treatment Syste
WaterGroup Companies, Inc.580 Park StreetRegina, SK, S4N 5A9, CanadaUSA Office:193 Osborne RoadFridley, MN, 55432, USAwww.pura.com55025.0113
2Specifications and Performance Data SheetModel # Part # Stage 1 Stage 2 Stage 3 Stage 4 Storage Tank FaucetQCRO4V-50 1340302-60Sediment FilterActiva
3 19.8"9.2"Product Water Storage Tanks15.8”2.0”4.7”14.3”2.5”13.1”Dimensions13.7"13.7"NOTES1. A booster is strongly recommended to
4Filter Cartridge Specifications * The performance and life of a reverse osmosis membrane or filter element is highly dependent upon pressure, tempe
5Performance Data Sheet† This appliance has been tested for the treatment of water containing pentavalent arsenic (also known as As(V), As(+5), or ars
6Suggested Installation Equipment Recommended Tools 1. Utility Knife 2. Flathead Screwdriver 3. Phillips Screwdriver 4. Center Punch 5. 7/8
7Overview of the PURA Quick Change RO System’s Components Manifold Assembly The manifold assembly serves as the functional hub of the PURA system by d
© 2020, manymanuals.de. Alle Rechte vorbehalten. | 0.438 s |
 Manymanuals.com
 Manymanuals.de
 Manymanuals.fr
 Manymanuals.it
 Manymanuals.pl
 Manymanuals.cz
 Manymanuals.es
 Manymanuals-pt.com
Kommentare zu diesen Handbüchern